Pimpin' PSPerssad
Would you like to react to this message? Create an account in a few clicks or log in to continue.


Pimpin' PSPers
 
HomeLatest imagesSearchRegisterLog in
Search


Display results as :
 
Rechercher Advanced Search
Your Admins
Photobucket Photobucket Photobucket Photobucket Photobucket Photobucket Photobucket Photobucket Photobucket Photobucket
Latest topics
» How it works and how to keep it clean!!
Lesson 4: Resizing and Cropping EmptyWed Nov 30, 2011 1:25 am by Admin

»  Street Cred Rules and Regs! Read and Sign
Lesson 4: Resizing and Cropping EmptyWed Nov 30, 2011 1:24 am by Admin

» Voter Sample Signup
Lesson 4: Resizing and Cropping EmptyWed Nov 30, 2011 1:23 am by Admin

» Voter's pop in here Please
Lesson 4: Resizing and Cropping EmptyWed Nov 30, 2011 1:23 am by Admin

»  Templates, templates, templates
Lesson 4: Resizing and Cropping EmptyWed Nov 30, 2011 1:22 am by Admin

»  Stamp Snags
Lesson 4: Resizing and Cropping EmptyWed Nov 30, 2011 1:21 am by Admin

»  Freebie Scrapkit Links
Lesson 4: Resizing and Cropping EmptyWed Nov 30, 2011 1:21 am by Admin

»  Marvelous Masks
Lesson 4: Resizing and Cropping EmptyWed Nov 30, 2011 1:20 am by Admin

»  Wonderful Wordart
Lesson 4: Resizing and Cropping EmptyWed Nov 30, 2011 1:19 am by Admin

Navigation
 Portal
 Index
 Memberlist
 Profile
 FAQ
 Search
Affiliates
Illustration store PicsForDesign.com Photobucket Photobucket Photobucket Photobucket Photobucket Photobucket Photobucket Photobucket Photobucket Photobucket Photobucket Photobucket Photobucket Photobucket Photobucket Photobucket Photobucket Photobucket Photobucket Photobucket


 Lesson 4: Resizing and Cropping

Go down 
AuthorMessage
Admin
Admin


Posts : 148
Join date : 2011-11-29

Lesson 4: Resizing and Cropping Empty
PostSubject: Lesson 4: Resizing and Cropping   Lesson 4: Resizing and Cropping EmptyWed Nov 30, 2011 12:18 am

Here is a simple lesson but will prove to be very valuable in your creations!

I'm
assuming that most everyone will be making tagger size kits. A lot of
the CU supplies out there come in full size, for those that do both.
It's easy to scale down an item for a kit rather than scale up. If you
scale up, you lose a lot of the quality of the item.

There is
nothing more frustrating to me when working with a kit for a tag that
the elements are not resized universally, meaning either they are tiny
or some are full size and some tagger. Keeping your elements universal
in size will increase the quality of your kits!

Ready??? Here we go!

First go here: http://grannyart.blogspot.com/ and pick an element to download. You can use the same one I did if you like. I chose the box trunks.

Next
once you have unzipped the file, open the elements in PSP. See how much
"clear space" is around the item? Or how large it is? Imagine trying to
put that in your tag! lol

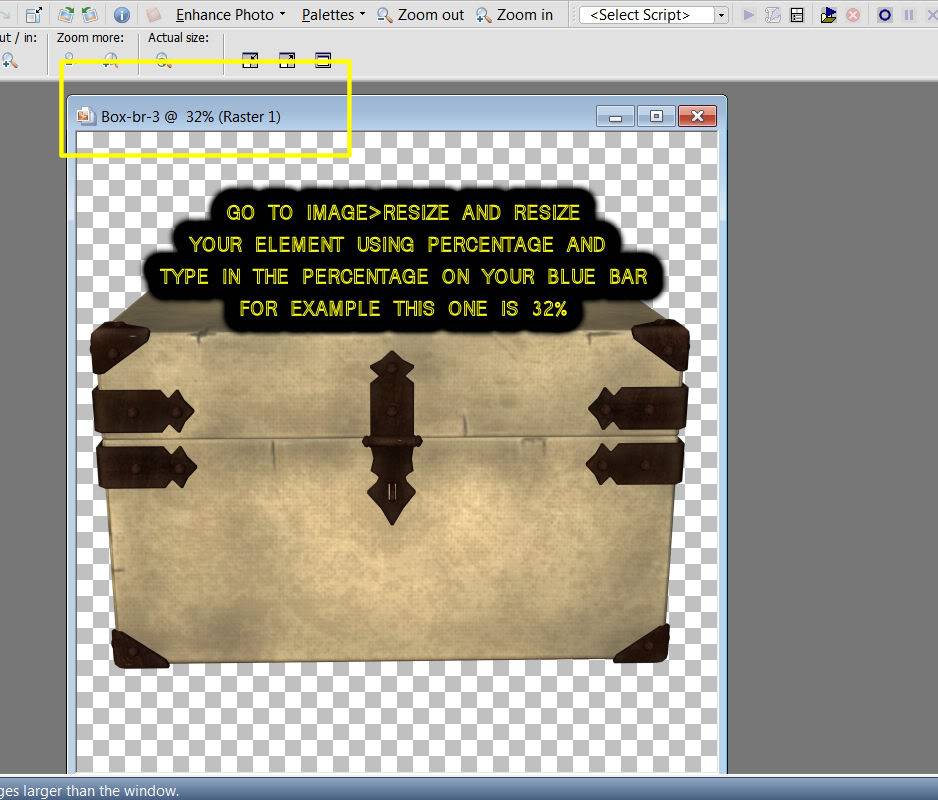
The first thing we're going to do is
resize it. Go to image>resize and set the resize to percentage.
Change the percentage to the one you see in the blue bar. For example
mine says 32%. So I sized DOWN to that percentage. Mind you, it's always
better to make your elements a bit larger (large tagger size) than it
is to make them super small! This gives the taggers who work with your
stuff the advantage of better creativity!

Lesson 4: Resizing and Cropping RL1

Now
it's time to crop it! Using your crop tool, move your cropping square
out so that you have it as close the element as you can with out
cropping into it. Right click and hit apply!

Lesson 4: Resizing and Cropping RL2

We got rid of the dead space! pretty cool huh? Here is my finished element

Lesson 4: Resizing and Cropping RL3

As
you get more comfortable and possibly going on to sell your kits in a
store, many of them will quality check your kits for this very thing.
You are making your kit look even better!

Follow this lesson and post your results here!
Back to top Go down
https://pimpinpspersdad.forumotion.com
 
Lesson 4: Resizing and Cropping
Back to top 
Page 1 of 1
 Similar topics
-
» Lesson 7: How to use Textures
» Lesson 6: How to use a Script
» Lesson 5: Using a template
» Lesson 1: Colors and Theme
» Lesson 2: Making a Paper

Permissions in this forum:You cannot reply to topics in this forum
Pimpin' PSPerssad :: Scrap Kit School :: Scrap Kit School-
Jump to: